
Halloween was a wonderful day for every Android-fanboy this time round as it was when Google released the Nexus 5 and along with it Android 4.4 KitKat. Although, for some (Galaxy Nexus owners), it wasn’t as good a day. Google officially announced that it’s Galaxy Nexus (both GSM and Verizon variants) would not receive any Android 4.4 KitKat goodness. To put it in another way, the Galaxy Nexuses will be stuck on Android 4.3 for eternity; ..and then the good Lord said, “let there be XDA”.
According to XDA Developers, the following AOSP ROM is quite stable (it is!) with the exception of a few isolated issues like animation and graphical glitches (did not bother us much) which will be fixed in the upcoming releases.
Pre-requisites to flashing this ROM
- Back up data and settings using a recommended custom recovery tool, like ClockworkMod (CWM) or TWRP, as it creates a complete image of the existing phone setup.
- Ensure USB debugging mode is enabled on the phone, by navigating to Settings > Developer Options (if you don’t see Developer Options, follow this pastie -> http://bit.ly/1h0xTLg)
- You must be rooted on your current firmware before updating and have a custom recovery installed. We suggest using ClockworkMod recovery.
Downloads Required
- Android 4.4 AOSP ROM for Galaxy Nexus I9250
- Latest Gapps by the Paranoid Android team
- Nexus Root Toolkit [Optional if you want root access after updating] (WINDOWS ONLY!)
Steps involved in updating the phone
- Connect your Galaxy Nexus to your computer and transfer the files you downloaded onto it’s storage.
- Power off the phone and disconnect its USB cable from computer.
- Boot the phone into Fastboot mode by pressing and holding Volume Up, Volume Down and Power buttons together.
- Once the device reboots, you should see something like this —
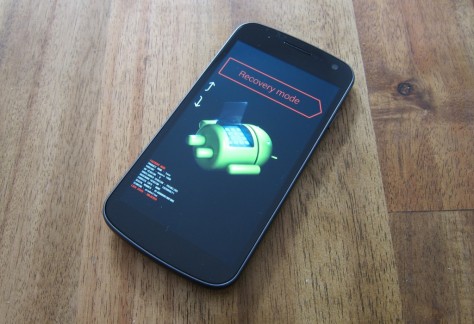
- Use the Volume up and Volume down buttons to navigate to the red banner above the opened up Android to say “Recovery mode” and then press the Power button.
- In ClockworkMod recovery, perform a full data wipe task by choosing Wipe Data/Factory Reset (use volume buttons to navigate and power button to select the desired option in recovery).
- Wait until the wipe process completes and then perform Wipe Cache Partition. Let the process complete and then select Wipe Dalvik Cache from advance option. This will prevent ROM related errors or boot loop issues.
- Once the wipe process is done, return to main recovery menu and select Install Zip from SD card.
- Then select Choose zip from SD card. Now, locate the Android 4.4 ROM zip file you copied earlier to the phone and select it by tapping Power button. Confirm the ROM installation on next screen and let the installation begin.
- Then, repeat the previous step for installing Google Apps as well.
- After Google apps is also installed, go back and tap on reboot system now in the recovery menu. The phone will now reboot automatically. The first boot might take about five minutes to complete. So, don’t worry!
- Once rebooted, you will be greeted with the Android setup wizard. Set your phone up and enjoy!

Steps involved to get get root access on the 4.4 ROM
- Install the Nexus Root Toolkit you downloaded earlier. It will extract certain files so make sure you install in within a folder.
- Once installed, you will be asked to select your device. Select Galaxy Nexus GSM/HSPA+ and the select you ROM as Custom ROM – KK. Then, let the toolkit do it’s thing until you’re greeted with the following dialog box.

- Under the Root section tick Custom Recovery if it’s un-ticked and then press Root.
- From here on, just follow the instructions the pop up on your computer and you’ll be fine.
- Once, the process ends, you will an up and running KitKat ROM with root access.
Source: XDA Developers
Update1 : Cyanogenmod 11 is now available for the Galaxy Nexus and it installs Kitkat!
For more exciting news regarding the world of technology, check Technologic 101 out on Google+ or on Facebook
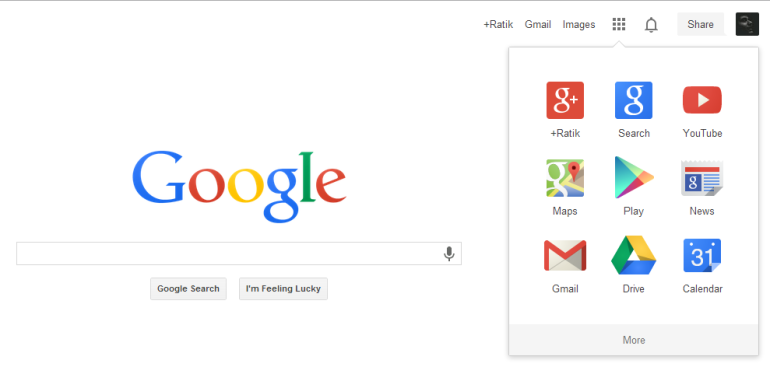 Today Google announced a New Logo and an updated Toolbar that will be rolling out over the next couple of weeks. For us digital/social addicts, that’s an eternity.


